
An Easy Way to Feature Client Testimonials on Your Squarespace Site
Using a Blog, Excerpts, and Summary Blocks to Share Reviews
Our website is constantly evolving, and one thing we’re still figuring out is how to display our collection of kind words from past clients. Inspiration struck recently, and we realized there’s a super simple way to showcase lots of reviews — and we can even break them up into different categories to feature on our separate service pages!
By the end of this post, you’ll be able to make a carousel like this one. Use the arrows to move between the five reviews we featured here:
Here’s the rundown:
Create a new unlisted blog. Give your new blog a name that will be easy to find later, like “Testimonials”. If your site is anything like ours, your Pages sidebar is slightly chaotic, ha!
Pages > Not Listed > + > Collections > Blog

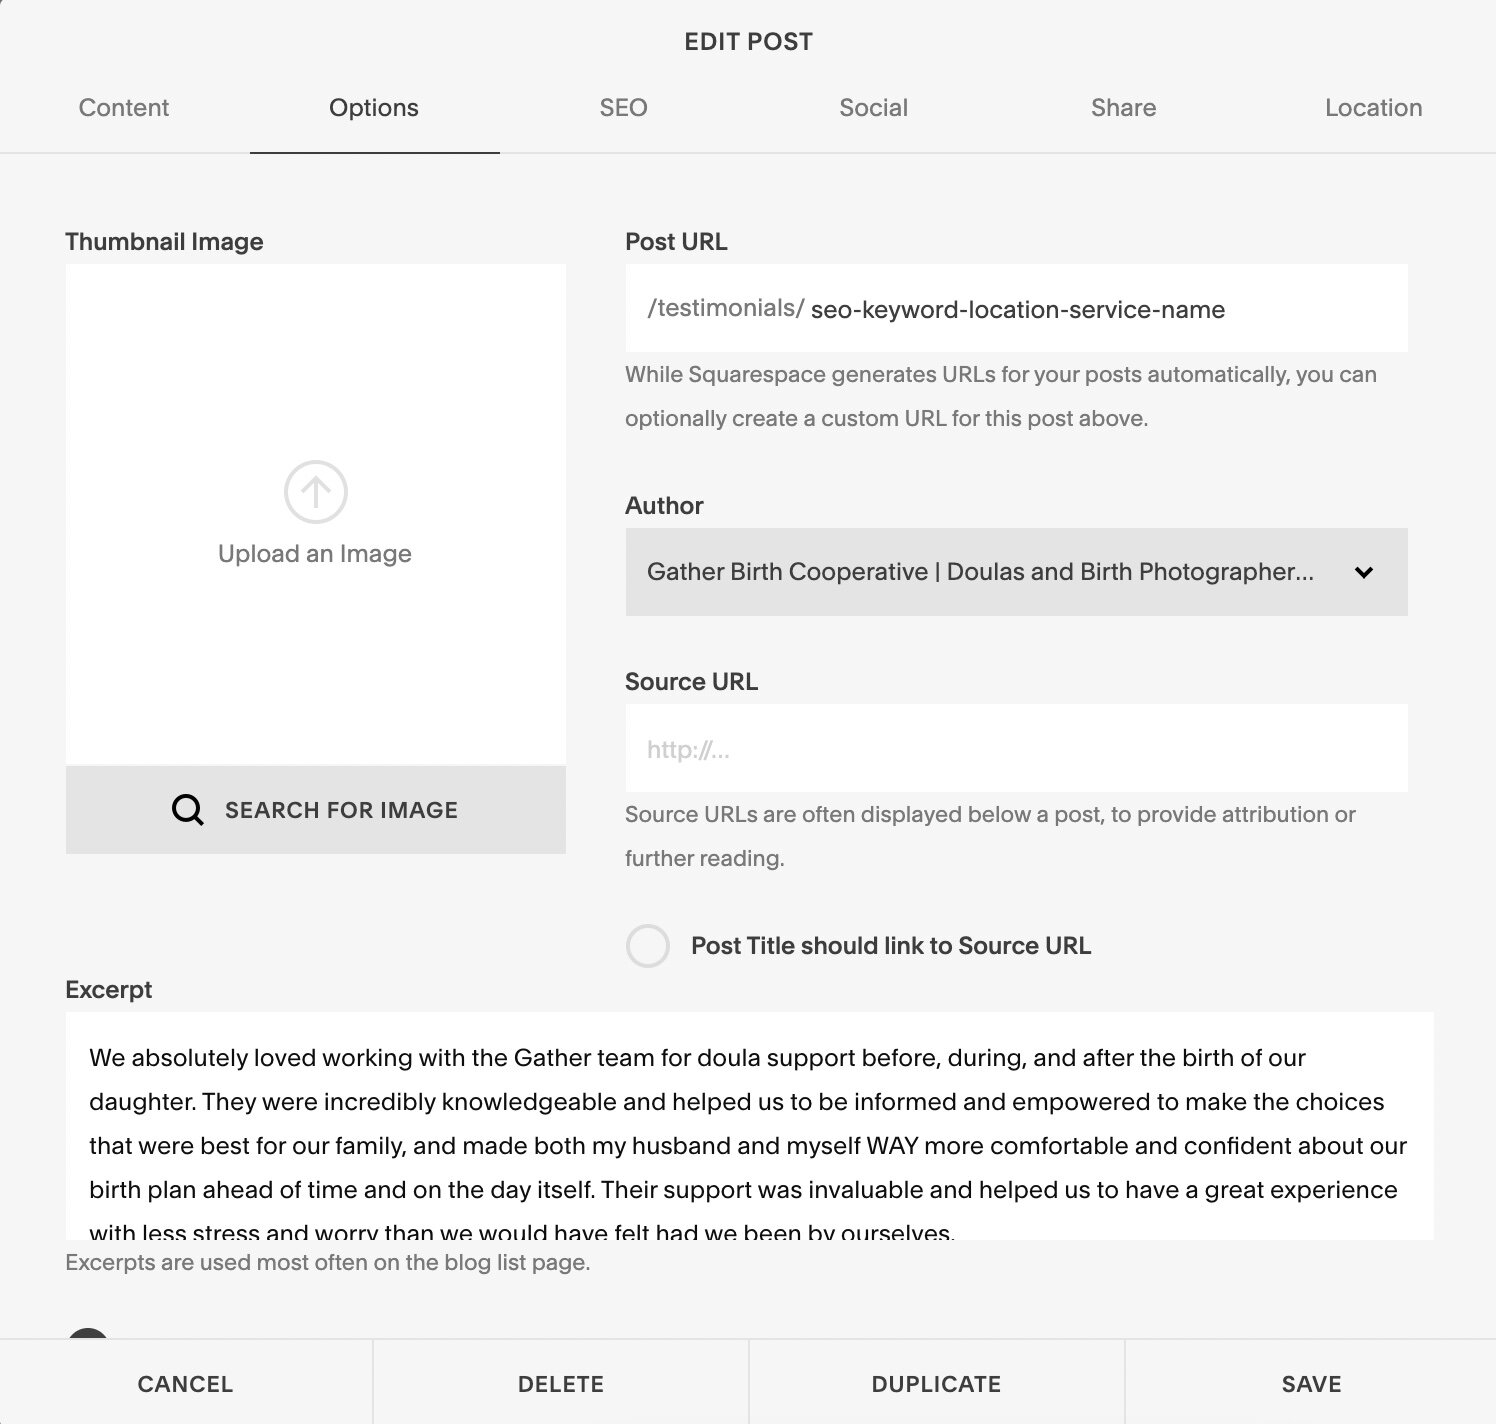
For each testimonial, you’ll create a new blog post in your new blog. What you enter in the Content tab for the title and body of the post isn’t super important, but we chose to use our client’s name as the title and copied their feedback into the body of the blog post to keep things tidy in our blog sidebar. The necessary step here is on the Options tab. Enter your testimonial and client attribution in the Excerpt field. No need to add a Thumbnail Image because you’ll be disabling this feature later. Consider making your Post URL work in your favor by entering a few of your SEO keywords. Every little bit helps!
Once you’ve done that, you may want to utilize the Categories and Tags features too. If, for instance, you have reviews for different services and you want to feature those reviews on different pages, this will make it easy for you to separate them. The majority of our reviews are for our Doula Support Services and our Birth Photography Packages, so we put our reviews into those two categories. Squarespace makes it easy to add and even rename categories down the line!

After you publish your featured testimonials, go to the page where you want to showcase them and add a new Summary Block. We suggest adding them to either your homepage, your about page, or a relevant service page.

You’re almost done! On the Content tab of your new Summary Block, select your new blog, choose “none” for Primary and Secondary Metadata, and filter your items if you added Categories or Tags.

Then, on the Design tab, increase your number of items to 30 (or however many you want to display), choose 1 item per row, and deselect every Element aside from the Excerpt. You can also add Header Text here. We chose to leave ours blank, but consider adding Testimonials (as shown), Kind Words from Clients, or Praise to the field.


There! You just added a carousel to your Squarespace website featuring your favorite client reviews! To change the order in which your reviews appear, adjust the publish date and time on your blog posts.
Keep in mind that you can use this tutorial for other applications, too! Maybe instead of client reviews, you want to feature details of your service packages, funny tidbits on your about page, or your credentials and experience. You got this!
“We absolutely loved working with the Gather team for doula support before, during, and after the birth of our daughter. They were incredibly knowledgeable and helped us to be informed and empowered to make the choices that were best for our family, and made both my husband and myself WAY more comfortable and confident about our birth plan ahead of time and on the day itself. Their support was invaluable and helped us to have a great experience with less stress and worry than we would have felt had we been by ourselves.”
Hanna, Birth Support client